I debated whether or not to share this plumbing horror story and decided that this is the kind of DIY post I wish I saw more of, one where the desperate DIYer stopped giving a rat’s ass about what people might think and just dealt with the problem already!
All kidding aside, I want to preface the post by saying that this is not the way to do things. It’s a last resort for when you live in a home with components that were never meant to be repaired and when you can’t afford to hire the professional who could probably do something that is more ‘correct.’ This post is about establishing goals, finding ways to meet them, and accepting that the solution, while not ideal is good enough and that there’s no shame in that.
So again, please, do not try this at home.
I found another leak under my kitchen sink, this time from a joint right at the water heater. It’s likely that all the jostling from the other repairs caused it. This is something I always fear when working on an older plumbing system, that repairs to one part lead to damage to other parts. It becomes an endless vicious cycle of repair. I’m not kidding. The minute I applied pressure to the pipe, the whole assembly snapped loose.
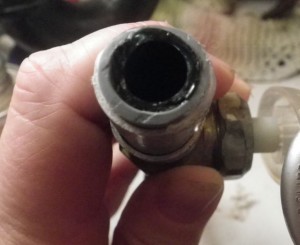
In a way, this wasn’t a bad thing. By eliminating the other bypass, I removed no fewer than seven joints and reduced them to just two. But you can’t repair PVC piping. All you can do is cut it out and put in a new piece. But what if there’s no room to attach anything? What if you’re looking at a section that is hard welded to the water heater in a tight space where is no room to work?
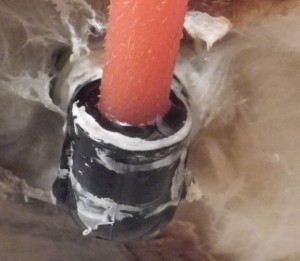
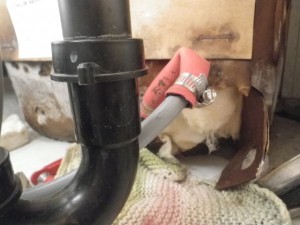
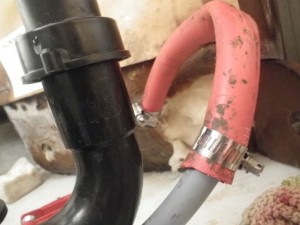
Well, there was just enough lip left on the bit sticking out of the water heater to attach a hose and clamp. Just barely. So I decided that I was going to fix this by bridging with a hose and clamps, just like for the first bypass fix. Of course, this would not be a fix and forget about it sort of repair because of just how precariously the hose would be attached to the bottom joint. I will never feel comfortable leaving my water pump on when I’m not around. But it’s a solution that it won’t leak as long as the clamp is tight. And I should add that I don’t drink from my holding tank, so I don’t mind not using plumbing grade hose.
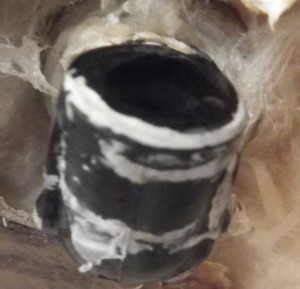
I wanted to give myself a little insurance in case the hose did ever come loose. After a bit of rummaging around, I found a hard plastic tube that was the perfect diameter to stick in the bottom piece, secured with a bit of rubber tape. My reason for doing this that if the hose were ever to loosen, this would keep the hose from separating from the pipe and flooding the rig. Spoiler alert, I had to do the hose installation twice and when I did it the second time, I was able to test my theory and was absolutely right. I got a few drops when I loosened the clamp, but most of it remained in the tube and I was able to drain in a controlled manner.
When I did the installation the first time, the hose was too short and I got a bad kink in it.
I still had regular pressure coming out of the tap, but I was worried that water pressure would build up because of the kink restricting the flow of water and that the pipe might explode. I tend to think pessimistically when I’m dealing with plumbing. 🙂
So I went back out to my MacGyver pile and cut myself a longer piece of hose. I still have a kink, but it’s not nearly as bad.
And there you have it. No more bypass, fewer joints, and, best of all, no leak. I’m posting this on Saturday afternoon because I’ve already done a few posts today, but it’s actually very, very, very late Friday night. I just wanted this dealt with now since I have a big Saturday of work and don’t want to be distracted. 🙂

