I had to do something about my internet situation since SaskTel is obviously getting kickbacks from the satellite company and only investing that way in my area. Getting a new, stronger, booster seemed like the logical step to take. I’d already upgraded from a cheap booster to a more expensive one and gotten an improvement in my signal strength, so it only made sense that an even more expensive (read stronger) one would do the same. The thing was, I was now in the 600USD+ range for spending, a huge gamble to take.
After doing some research and sending out emails, I was taken under the wing of Shawn from the Repeater Store. I can’t tally up how much time Shawn spent with me explaining why one booster was better for my situation than another, explaining technical things without patronizing me, and assuring me that I could get a refund if my purchase didn’t work out. But he was certain that I would see a ‘night or day’ difference going from my Wilson DT4G to the model of booster he was recommending.
Thanks to the generosity of my online community and even strangers, I was able to afford the nearly 1,200CAD price tag for the booster (700USD, plus a lightning protector, plus taxes, plus gas to go pick up in Montana to save big bucks on shipping) and placed my order. I was very disappointed that it did not ship as quickly as promised, until Shawn got back to me to confess that the model he’d sold me on had just been discontinued and that they were upgrading me at no cost to the brand new Fusion5S, a much more expensive (and powerful) booster, retailing for 850USD! There was a delay in shipping it out to me because they were waiting for stock to come in. Of course, they were immediately forgiven!
The first thing that impressed me about the Fusion5S was just how beefy and heavy the components are, a far cry from the cheap-feeling Wilson products I’ve been using. Even the coaxial cable is a smaller gauge for less loss.
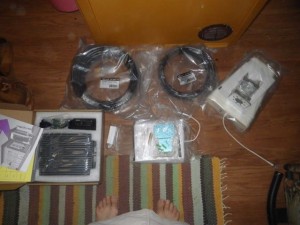
I unpacked all the components to make sure I had everything. I didn’t (more on that below), but I had what I needed to at least test out the booster and see if it would work.
Installation of my Fusion5s booster was a bit challenging because I had to ensure enough separation between the vertical and horizontal antennas and my property is quite small. I kept being told by the booster that there was oscillation (feedback) between the two antennas, no matter how far apart I put them. I eventually figured out, with the help of tech support, that as long as those lights disappear in a few minutes, the booster is working correctly. Augh! 🙂
I started my new booster life with the exterior antenna mounted at the peak of my cabin and the interior antenna on the driver’s side wall of my office. This gave me a signal strength comparable to what I had before, but my connection was much more stable. In that sense, I got the ‘night or day’ difference I’d been promised, but it still felt like a very precarious situation even though I got through a whole week of work with no drops in service or need to go up the hill.
So despite all the time and effort of getting the antenna up on the peak, I decided to go back to how I’ve had my antennas for several summers now, quite low to the ground at the northwest corner of my lot, where I almost have a line of sight down the valley. I mounted the antenna pole temporarily and then played with the height until I got the best signal I could. It was still no better than what I was getting at the peak. Therefore, I made the decision to just leave the antenna low to the ground so it would be easier to take down and pack up for the winter.
A day or two later, my “adopted dad” Charles and another neighbour got together and cut down a bunch of giant tree limbs blocking my line of sight down the valley (!!!). That gave me a couple of extra points of signal strength, for which I was glad because the guys did a lot of work on that project! So that was it for playing with the external antenna and I decided to mount it permanently where it was.
I still don’t want to commit to cementing the pole into the ground, so my fire pit full of rocks is an acceptable substitute and has the added bonus of providing a buffer in case a vehicle strikes it (I have a neighbour who frequently comes here on his ATV, and I sometimes drive out the back of the property).
My first attempt at bringing in the exterior cable was through the roof hatch, like I did with the old booster, which I never installed permanently, but I didn’t want to deal with this extra cable in my way. I already had larger-gauge coaxial coming in through my shore power cable box, so it made sense to use the same route and principle.
This is the before:
On the outside, you can screw a cable connection to the the RV. Inside, a small piece of coax goes to another plate with a similar connector and then you screw your TV to that.
Now, I didn’t have the interior connector, but I did have the exterior one in the form of my lightning protector.
I’ll add a parenthesis here that the lightning protector is where the Repeater Store nearly dropped the ball. They forgot to include an extra 2′ of cable needed for the installation. You need the long cable from the exterior antenna to the protector, and then you need a shorter bit to go from the protector to the booster. It took several emails to find out how the store was going to handle that. I finally got a call from Shawn letting me know it was being shipped to Plentywood for me. A bit of a pain to go back across the border twice and Plentywood isn’t right next door, but I have free time now, can afford the fuel, and am always happy to have an excuse to go for a drive, so this was an acceptable resolution! 🙂
I’ve never had a lightning protector for my booster systems and probably don’t need one because my antenna is so low to the ground, but I paid $1,200 for this system so I’m not taking a chance!
To be able to mount the protector, I had to enlarge an existing hole in my sidewall. That wasn’t as scary as I expected it to be. Then, I took the short bit of cable and poked it through the larger hole, connected it to the protector, pushed everything back into the wall, attached a new faceplate (that I had drilled an appropriate-sized hole into), and then a nut that comes with the protector to secure it to the faceplate, like so:
I’d say that looks pretty professional and polished, no? I’m quite pleased with myself. 🙂 When I leave next month, I can just unscrew the exterior cable, roll it up, and tuck it away for the winter along with the exterior antenna.
Something you don’t see too well in that picture is a thin green grounding wire. Croft has examined my grounding set up and deemed it adequate, but since it’s not as per code, I’d rather not show it off lest I give people lacking in common sense bad ideas. 😉
I then poked my little bit of cable through the interior faceplate I originally had there, only with a much bigger hole in it. I wound up not having much cable left, so the booster, which I had mounted over my converter, needed to be moved. I didn’t mind this because the way I tried it originally meant that the converter cover was difficult to open.
So here’s the mounted booster:
It’s against my driver’s side wall, between my filing cabinet and my converter.
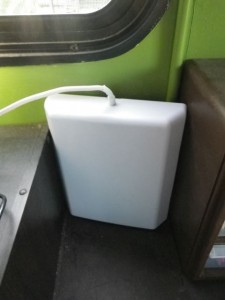
So that takes us to the interior antenna. It took a bit of experimentation, but I discovered that if I put it under my window on the passenger side of the office, right next to my desk, it is essentially back to back with the outside one and I get my best signal…
Getting the interior cable there was super easy. You can see it in the above photo, heading to the left of the booster facing it. It’s going behind my filing cabinet, under the mattress on the spare bed, under the desktop, behind the desk drawers, up through two existing holes in the desk, and to the antenna, which is wedged between my supply cubbies and desk shelf:
I can’t imagine a more perfect place for it since it’s absolutely out of the way and I don’t have to deal with much cable.
So now, that takes us to my best signal strength.
Before I get into that, I have to state that the booster claims that, depending on the original signal strength and how far apart the two antennas are, you can get enough coverage for a property my size. But my original signal strength is zero, so I have just a bit of coverage in my back yard, enough to get a signal, but not really enough to use. The original signal is so bad, in fact, that I only get my best signal if I’ve got the phone right against the interior antenna.
So what is my best signal? It’s urban area-quality, ranging from -55 to -70. There are not enough exclamation points in the world to illustrate how I feel about this.
I get -50s early weekday mornings. It’s usually -70s around the supper hour and on weekends and I’m in the -65ish range the rest of the time. These numbers are incredible. I am in absolute and utter disbelief. I don’t even get that good of a signal in Moose Jaw or in Assiniboia! Compare this to when -86 was a good day for me, -95 was average, and -100 (or worse) was common at peak hours.
Now, no one should think that I have acceptable internet now. It is an incredible victory to have a signal I can rely on, that I haven’t had to run up the hill to send an email in weeks, and that I can stream short videos. But I’m still throttled after 10GB, so I have a very, very, very slow connection. I still can’t do more than one thing at one time or fully load all the pictures on a particularly graphic-heavy webpage. But I haven’t had to go up the hill once in weeks. I am able to receive and respond to work emails in a timely manner. I am sleeping much better because I’m no longer worried I am going to lose my job. I am so much less stressed at work and performing better. This booster has been an absolute game changer for me and I am so grateful to every single person who made this possible for me.
Since my signal drops so much when I pick up the phone to make or receive a call, I’ve had to find a workaround to make clear calls. As it turned out, I got a good deal on a bundle of apps recently, including HandsFree, which connects my iPhone to my Mac and allows me to make and receive calls through the computer. I’ve been test running it and it works very well!
So to recap, the SureCall Fusion5s Signal Booster has changed my life. That is not hyperbole. Internet here at Haven is still terrible and unacceptable, but the Fusion5s is making it possible to do my job and has greatly reduced my stress level. I think it would be overkill for most situations, but when you live in a ‘bowl’, get only refracted signals, and need to connect to a tower more than 50KM away, it could be the solution. Neighbours down the road who have a clear view down the valley and get one bar in their living room without a booster are using my old DT4G and it is performing perfectly for them. They were going to get something a little more powerful and they really didn’t need it. So don’t go spending this kind of money unless you’re sure you need to. But if you need to, be glad that the Fusion5s exists!
My experience with the Repeater Store was generally positive. Technical support was fantastic even if they need to work on their communication skills a bit better when it comes to the ordering side of things. But considering just how much they did for me in terms of education, upgrading me to the Fusion5s, and how they dealt with the missing piece for the lightning connector, I’m nitpicking. I don’t mind if people don’t communicate super well as long as things are done and the Repeater Store didn’t just get things done, it surpassed my expectations.
I’m still planning to spend most of next summer away from Haven, but knowing that I’ll be able to work while I am here will make me that much happier to get home for a few weeks. Thank you so much again to my generous sponsors as well as Croft and Shawn for all their technical handholding!


